Implementing a MISP server will allow Cortex, or any application capable of issuing a simple REST request, to query against feeds of threat indicators, most notably for IP addresses, URLs, and file hashes. The MISP server will allow you to control the subset of feeds you wish to subscribe to and query against, but it’s up to you to find the right balance in selecting the feeds. The information returned depends on the additional data provided by the feed and varies greatly among feed sources. Some feeds are simple block lists while others provide a wealth of additional data. Take a look at feed number 1 from CIRCL for an example of the data that can be provided.
I’ve chosen to deploy this server as a Docker container as it’s significantly easier than installing from source. I’ll run the Harvard Security group’s implementation at https://hub.docker.com/r/harvarditsecurity/misp
As their page suggests I’m using /docker on my system as my $docker-root and I created /docker/misp-db and /docker/certs
Also note, as indicated on their page, that if deploying this into production you should use their build.sh script so you can change default MySQL password and MISP_FQDN before building a custom image.
Initialize the MISP database:
docker run -it --rm -v /docker/misp-db:/var/lib/mysql harvarditsecurity/misp /init-db
This will spin-up a container, run the script to populate the misp-db directory with the necessary database files, and delete the container. If you navigate to your misp-db directory you should find it populated with files.
Generate SSL certs
I’m doing this because I was unable to query MISP from Cortex until I did.
sudo openssl req -x509 -nodes -days 365 -newkey rsa:2048 -keyout /docker/certs/misp.key -out /docker/certs/misp.crt
Just hit Enter for every question to accept the defaults.
Run the container
docker run -it -d \
    -p 443:443 \
    -p 80:80 \
    -p 3306:3306 \
    -v /docker/certs:/etc/ssl/private \
    -v /docker/misp-db:/var/lib/mysql \
    harvarditsecurity/misp
Open a web browser to https://localhost
Use admin@admin.test as the username and admin as the password.
You’ll be prompted to change your password. The new password must be at least 12 characters with one uppercase and one special charater.
Configure MISP
Administration > Server Settings & Maintenance > MISP Settings
MISP.live to TRUE
MISP.disable_emailing to TRUE
MISP.baseurl to the IP of MISP
Administration > Scheduled Tasks
Set fetch_feeds to 24 and click “Update All”
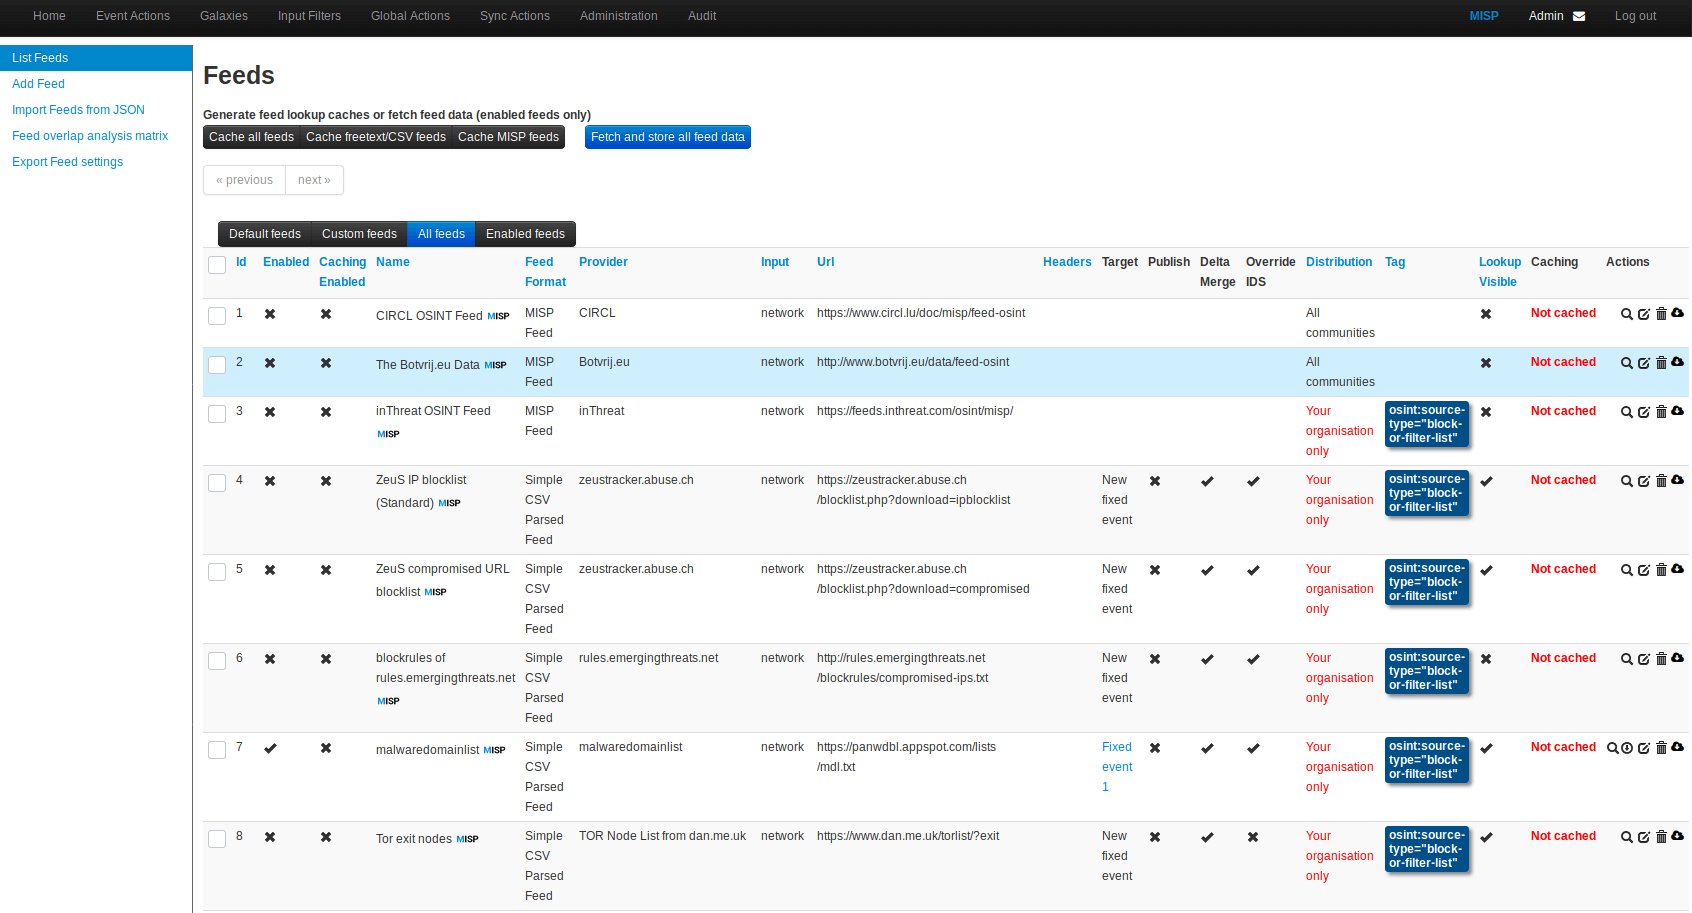
Sync Actions > List Feeds
Pick a list feed to subscribe to. I chose malwaredomainlist. Check the box and click “Enable Feed” at the top.
Now find that feed in the list again, look to the right at the icons for a magnifying glass and trash can. Click on the circle with the down arrow to “Fetch all events”. You’ll see a task executing under Administration > Jobs
In the same group of icons click the magnifying glass. This will show you the list of IPs included in this blocklist. Copy one of them, we’ll use it later for testing.
Postman
We’re going to test the API with Postman. Go ahead and install the app and launch it.
Go to File > Settings and set “SSL certificate verification” to OFF
In MISP, navigate to Administration > List Users and copy the Authkey for the solitary user.
In Postman go to the Headers tab and enter the following 3 headers
Accept application/json
Content-Type application/json
Authorization <API_Key>
Paste the Authkey from MISP into the Authorization field.
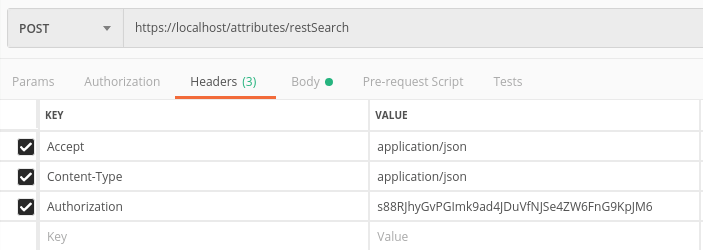
At the top change the REST command from GET to POST with an API endpoint of https://localhost/attributes/restSearch
Change to the “Body” tab, click the “Raw” radio button and paste in the following JSON, replacing the “value” with the IP from the malware blocklist you copied down earlier. We want to make sure we pass an IP that will result in a hit.
{
    "returnFormat": "json",
    "value": "23.253.130.80"
}
You should receive back a response
{
    "response": {
        "Attribute": [
            {
                "id": "15",
                "event_id": "1",
                "object_id": "0",
                "object_relation": null,
                "category": "Network activity",
                "type": "ip-dst",
                "to_ids": false,
                "uuid": "5c8550db-5314-4538-a0d8-0146ac110002",
                "timestamp": "1552240859",
                "distribution": "0",
                "sharing_group_id": "0",
                "comment": "",
                "deleted": false,
                "disable_correlation": false,
                "value": "23.253.130.80",
                "Event": {
                    "org_id": "1",
                    "distribution": "0",
                    "id": "1",
                    "info": "malwaredomainlist feed",
                    "orgc_id": "1",
                    "uuid": "5c8550db-2d90-425f-9bc5-0146ac110002"
                }
            }
        ]
    }
}
Your MISP container is now responding to queries and is ready for Cortex. We’ll configure that in the next post.
Go back to Feeds List and subscribe to a few more feeds.