“BloodHound uses graph theory to reveal the hidden and often unintended relationships within an Active Directory environment.” In short, it analyzes group membership, GPOs, permissions, and currently logged-on sessions to visually displays links between objects in order to identify misconfigurations and easy paths to compromise. This tool is not for analyzing the permissions on a single server, but rather for identifying the path of least resistance to gaining elevated Domain permissions.
As an attack tool, a malicious actor would run the ingestor on a compromised Domain workstation on which they had gained local administrative privileges. This would essentially map out the network for them and reveal where their attention should be turned in their quest to achieve Domain Administrator privileges. By analyzing the graph, an attacker can make informed decisions about how to move within the network. This may require exploiting an ACE misconfiguration, or pivoting to a workstation with a logged-in Domain Admin and running CrackMapExec or mimikatz to harvest credentials.
As a Systems Administrator, you can do the same in order to identify avenues of attack, improperly assigned privileges, and circular group assignment.
The following instructions will walk you through installing Neo4j and BloodHound on an Ubuntu workstation. We then run the ingestor on a Domain joined workstation and import the results into BloodHound for analysis. I did attempt initially to get BloodHound working on a Windows workstation but was unsuccessful. My first issue was that Neo4j looks for a “server” folder in the Java installation directory at C:\Program Files (x86)\Java\jre1.8.0_181\bin. Since this does not exist by default you must manually create it and copy over the contents of the pre-existing “client” directory. After resolving this issue and the Neo4j service still not starting I switched to Ubuntu.
Bloodhound software installation
BloodHound provides a Getting Started page on their wiki.
At its core, BloodHound is a single page Javascript web application and a Neo4j database fed by an ingestor. Neo4j requires Java, so we’ll start there.
I performed the following on a new Ubuntu 18.04 minimal VM.
java --version should return with installation suggestions but show no Java currently installed. I began by installing the default-jre package but was unable to get Neo4j to run. I ended up uninstalling and installing openjdk-8-jre-headless instead.
sudo apt install openjdk-8-jre-headless
I then visited the Neo4j Download website and selected Download Neo4J Server and then Community Edition. I want to keep the installation up-to-date so I clicked the link to the Debian repository and followed the instructions for setting up the repository.
wget -O - https://debian.neo4j.org/neotechnology.gpg.key | sudo apt-key add -
echo 'deb https://debian.neo4j.org/repo stable/' | sudo tee /etc/apt/sources.list.d/neo4j.list
sudo apt-get update
sudo apt-get install neo4j
Now to prevent future errors go ahead and run sudo apt install libgconf-2-4.
The Neo4j executable gets installed to /usr/bin/neo4j. You can run it manually with neo4j start but you’ll receive a permissions error. You can verify the service exists with sudo service neo4j status. I find that when I start the VM usually the Neo4j service is not in a good state. For this reason after the VM first loads one of my first actions is to run sudo service neo4j stop and sudo service neo4j start.
There are two Bloodhound downloads you must grab from Github. First go to the main BloodHound page](https://github.com/BloodHoundAD/BloodHound) and click the green “Clone or download” button to download the master branch. Now go to the Releases page and download BloodHound-linux-x64.zip. Extract both packages.
Now you need to edit the Neo4j configuration to point to the example DB.
sudo nano /etc/neo4j/neo4j.conf
The first configuration parameter is dbms.active_database. This should be uncommented and point to the full path of the BloodHoundExampleDB.graphdb folder from the first download. As an example, mine looks like
dbms.active_database=/home/me/Bloodhound/BloodHoundExampleDB.graphdb
The second line to change is dbms.security.auth_enabled. This should be uncommented and set to false. Please be aware that we’re now running the web server with API authentication disabled and that this is not a good long-term solution.
Now restart neo4j with sudo service neo4j restart and check it with sudo service neo4j status.
If all worked well you should be able to point your browser to http://localhost:7474 to access the Neo4j Browser. You don’t have to do anything on the page, just make sure it loads.
To run BloodHound open a terminal prompt and navigate to the location of the extracted files from the second download. Run bloodhound with ./BloodHound
At the login prompt use neo4j for the username and BloodHound as the password.
Data Collection
From the first download (master branch) go into the Ingestors folder. Here you will find both the executable as well as the Powershell script that can be run to collect Domain information. I chose to run the executable (after installing .NET 3.5 Feature, this might be a good reason to prefer the script).
Both methods accept the same parameters, but I ran it simply by double-clicking the executable and letting it decide the most appropriate way to collect the information. The program will create a few JSON files and before it completes it will zip them up together. I ran it from a Domain joined workstation with the Remote Administration Tools installed while logged in as a local administrator.
Within BloodHound, click the hamburger menu in the top left to expand that window. You are now looking at the Database details. Clear the database by clicking the red Clear Database button, followed by Yes on the next screen. All your object counts should be at 0.
You now simply have to take the zip file and drag it onto the BloodHound webpage to import the data into the DB. As the data is ingested you should see the user, group, and computer counts climb up from 0.
Now select the “Queries” tab from that menu and run the first query “Find all Domain Admins”. You should see a graph rendered which looks similar to the following.
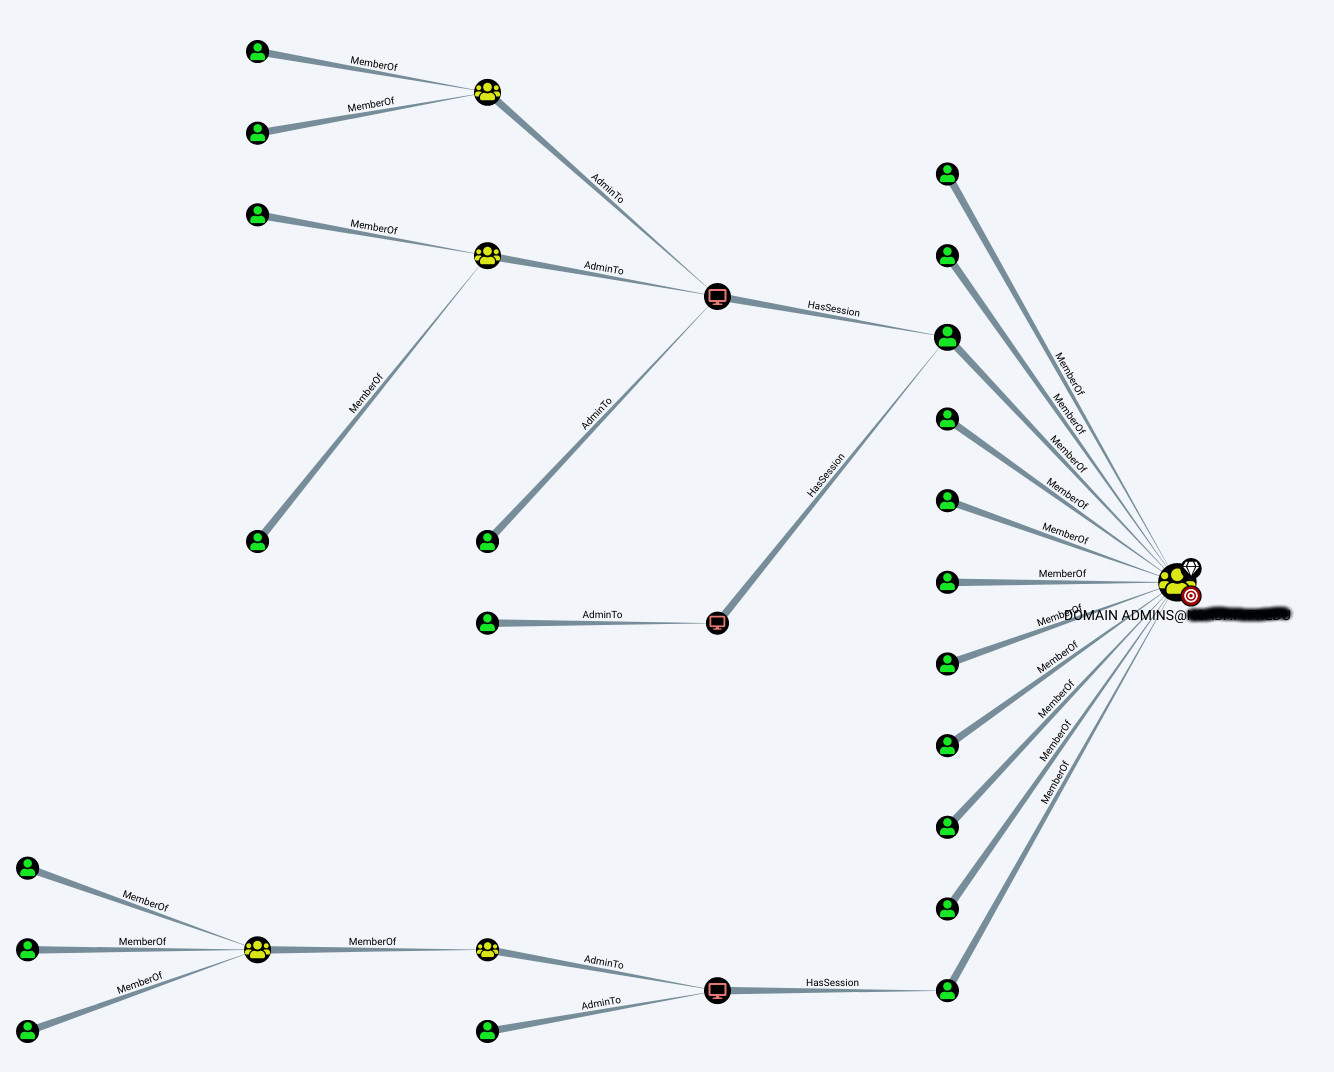
Here you can see user accounts in green, groups in yellow, and machines in red.
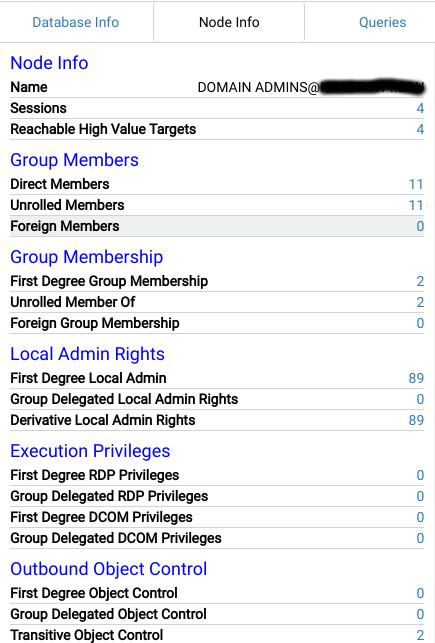
Clicking the Domain Admins node causes additional details to be displayed in the “Node Info” tab of the search window.
But remember to look at more than just Domain Admins. The query “Shortest Paths to High Value Targets” will graph all groups that have elevated permissions, including Enterprise Admins, Backup Operators, Group Policy Creators, and custom groups.
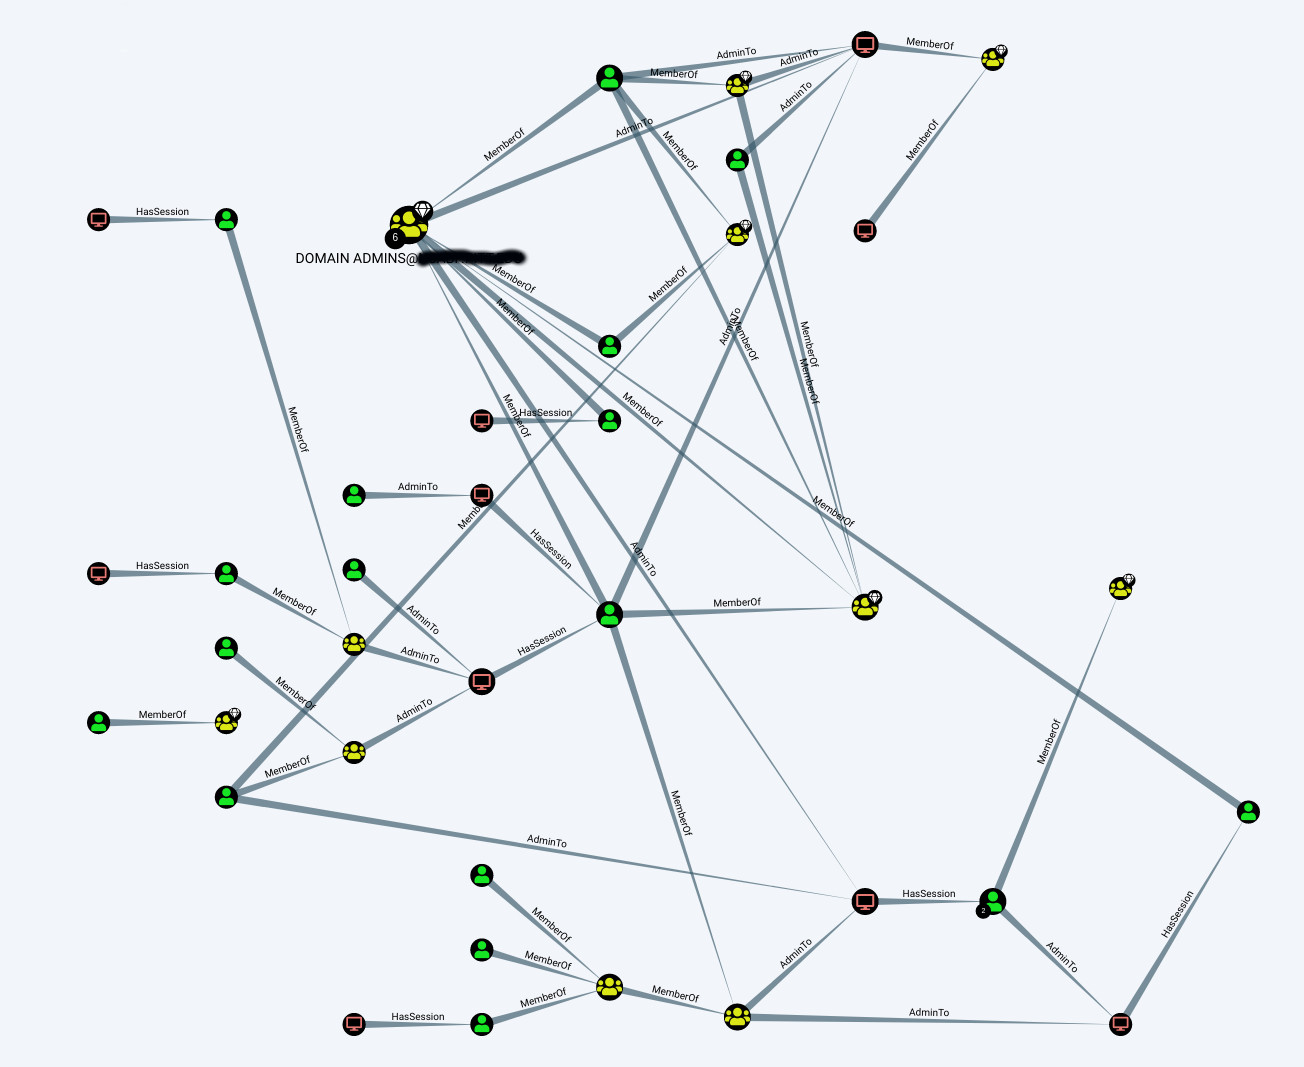
Now it’s a matter of walking the paths, unrolling group membership, and identifying the misconfigurations. Let the hunt begin!