Cuckoo Sandbox is an open source malware analysis system used to launch files in an isolated environment and observe their behavior. Pass it a URL, executable, office document, pdf, or any file, and it will get launched in an isolated virtual machine where cuckoo can observe it’s process execution, API calls, network access, and all filesystem activity. You’ll then get a report and a threat score based on the observed behavior. Once the analysis is complete the VM restores to a known good snapshot and waits for the next execution.
Once Cuckoo is running you can pass it samples in three ways. Drag and Drop through the web interface, through the command line with cuckoo --submit, or through the API.
I’m going to install Cuckoo 2.0.6 on Ubuntu Desktop 16.04. I need a GUI to run Virtualbox and running this on 18.04 is problematic due to a change in Openssl 1.1.0. I’m sure I could have just as easily gone with a server OS and GUI. I’m running as the user cuckoo.
The official installation instructions are here and many of the steps in this tutorial were copied from this excellent guide.
For my VM I’m using a licensed copy of Windows XP. You’ll need the XP ISO and a license key or a trial version. Cuckoo is supposed to work equally well with Windows 7 but I’ve not tested that.
Note that this is not an efficient or secure installation. I’m unsure if all the packages being installed are necessary, for instance you’ll be installing sqlite, mongodb, and postgres which is really not recommended. I’ve taken these steps from other guides and haven’t bothered to do a full clean-up. Also note ironically that if you want to enable searching in Cuckoo you need to install yet another database, Elasticsearch.
Installation
Start with some pre-requisites
sudo apt-get install git mongodb libffi-dev build-essential python-django python python-dev python-pip python-pil python-sqlalchemy python-bson python-dpkt python-jinja2 python-magic python-pymongo python-gridfs python-libvirt python-bottle python-pefile python-chardet tcpdump apparmor-utils libjpeg-dev python-virtualenv python3-virtualenv virtualenv swig postgresql libpq-dev libguac-client-rdp0 libguac-client-vnc0 libguac-client-ssh0 guacd autoconf libtool libjansson-dev libmagic-dev libssl-dev -y
Set TCPDump for non-root user
sudo aa-disable /usr/sbin/tcpdump
sudo setcap cap_net_raw,cap_net_admin=eip /usr/sbin/tcpdump
Test by running getcap /usr/sbin/tcpdump and expect to get back /usr/sbin/tcpdump = cap_net_admin,cap_net_raw+eip
Install Yara
wget https://github.com/plusvic/yara/archive/v3.4.0.tar.gz -O yara-3.4.0.tar.gz
tar -zxf yara-3.4.0.tar.gz
cd yara-3.4.0
./bootstrap.sh
./configure -with-crypto -enable-cuckoo -enable-magic
make
sudo make install
Test and make sure you get back a version number
yara -v
And install yara-python
cd yara-python
python setup.py build
sudo python setup.py install
Install ssdeep
cd ~/
wget http://sourceforge.net/projects/ssdeep/files/ssdeep-2.13/ssdeep-2.13.tar.gz/download -O ssdeep-2.13.tar.gz
tar -zxf ssdeep-2.13.tar.gz
cd ssdeep-2.13
./configure
make
sudo make install
Test and make sure you get back a version number
ssdeep -V
Install some python dependencies
pip install pydeep
pip install openpyxl
pip install ujson
pip install pycrypto
pip install distorm3
pip install pytz
pip install jsonschema
Install Volatility
git clone https://github.com/volatilityfoundation/volatility.git
cd volatility
python setup.py build
python setup.py install
Make sure you’re installing VirtualBox 5.1 or earlier, not 5.2 or later.
apt-cache policy virtualbox
Install Virtualbox
sudo apt-get install virtualbox
Add my cuckoo user to the vboxusers group
sudo usermod -a -G vboxusers cuckoo
Copy your Windows XP ISO (or Win7) to /home/cuckoo/
As the cuckoo user create the VM.
vboxmanage createvm --name windowsxp --ostype WindowsXP --register
vboxmanage modifyvm windowsxp --memory 1000 --acpi on --boot1 dvd --nic1 nat
cd ~/VirtualBox/windowsxp
vboxmanage createhd --filename windowsxp.vdi --size 12000
vboxmanage storagectl windowsxp --name 'IDE Controller' --add ide --controller PIIX4
vboxmanage storageattach windowsxp --storagectl 'IDE Controller' --port 0 --device 0 --type hdd --medium windowsxp.vdi
vboxmanage storageattach windowsxp --storagectl 'IDE Controller' --port 0 --device 1 --type dvddrive --medium /home/cuckoo/WXPVOL_EN.iso
vboxmanage hostonlyif create
vboxmanage modifyvm windowsxp --nic1 hostonly
vboxmanage modifyvm windowsxp --hostonlyadapter1 vboxnet0
Locally, from the GUI console of the OS (not an ssh session), open the Terminal application and run vboxmanage startvm windowsxp.
Your VM should start and boot from the ISO allowing you to install the Operating System.
While the OS is installing we’ll switch gears for a moment and setup the host machine to talk to the guest and forward traffic.
You’ll want to change enp0s25 in the first rule to match the public interface name of the network card in the host with Internet access. Get this by running ip addr.
Run the following commands on the Linux host machine.
sudo iptables -t nat -A POSTROUTING -o enp0s25 -s 192.168.56.0/24 -j MASQUERADE
sudo iptables -P FORWARD DROP
sudo iptables -A FORWARD -m state --state RELATED,ESTABLISHED -j ACCEPT
sudo iptables -A FORWARD -s 192.168.56.0/24 -j ACCEPT
sudo iptables -A FORWARD -s 192.168.56.0/24 -d 192.168.56.0/24 -j ACCEPT
sudo iptables -A FORWARD -j LOG
Note that these rules aren’t currently persistent, meaning they’ll be erased on reboot. To make them permanent install the iptables-persistent package. When you modify the rules in the future use sudo netfilter-persistent save to make the change permanent.
Now we’ll enable forwarding in the kernel.
echo 1 | sudo tee -a /proc/sys/net/ipv4/ip_forward
sudo sysctl -w net.ipv4.ip_forward=1
Complete the guest OS install and continue with the steps below.
Once completed, don’t install any additional system updates and configure the VM with a static IP.
IP: 192.168.56.10
Subnet: 255.255.255.0
Gateway: 192.168.56.1
DNS: 8.8.8.8
Try and ping the host PC ping 192.168.56.1. You should get a response.
Install the Virtualbox guest additions in the guest OS and enable host to guest drag and drop from the VM settings.
Settings > General > Advanced > Drag'n'Drop: Host to Guest
Download the following packages and drag them into the guest OS to copy them to the Desktop. Now install them.
The Python 2.7 installer for your guest OS.
The Python Imaging Library to take snapshots of the files executing.
Cuckoo Agent and place the file in the startup folder of the guest VM so it executes on startup. A command window should open showing the agent is listening.
This would also be a good time to install Adobe Acrobat Reader and perhaps a trial version of Microsoft Office.
The way in which the VM is snapshotted and the state it’s in is very important for cuckoo.
Do the following exactly as I describe. Visit the Cuckoo troubleshooting doc for more information.
While the VM is running
vboxmanage snapshot windowsxp take snapshot1 --pause
vboxmanage controlvm windowsxp poweroff
vboxmanage snapshot windowsxp restorecurrent
And now, as the cuckoo user, install Cuckoo.
cd ~\
git clone https://github.com/cuckoosandbox/cuckoo
cd cuckoo
python stuff/monitor.py
python setup.py build
sudo python setup.py sdist
sudo python setup.py build install
Now run Cuckoo
cuckoo -d
  eeee e   e eeee e   e  eeeee eeeee
  8  8 8   8 8  8 8   8  8  88 8  88
  8e   8e  8 8e   8eee8e 8   8 8   8
  88   88  8 88   88   8 8   8 8   8
  88e8 88ee8 88e8 88   8 8eee8 8eee8

 Cuckoo Sandbox 2.0.6
 www.cuckoosandbox.org
 Copyright (c) 2010-2018

=======================================================================
    Welcome to Cuckoo Sandbox, this appears to be your first run!
    We will now set you up with our default configuration.
    You will be able to see and modify the Cuckoo configuration,
    Yara rules, Cuckoo Signatures, and much more to your likings
    by exploring the /home/cuckoo/.cuckoo directory.

    Among other configurable items of most interest is the
    new location for your Cuckoo configuration:
              /home/cuckoo/.cuckoo/conf
=======================================================================

Cuckoo has finished setting up the default configuration.
Please modify the default settings where required and
start Cuckoo again (by running `cuckoo` or `cuckoo -d`).
Modify the Cuckoo configuration
nano /home/cuckoo/.cuckoo/conf/cuckoo.conf
under [resultserver] verify that "ip=192.168.56.1" is set.
nano /home/cuckoo/.cuckoo/conf/virtualbox.conf
Since we’re using Virtualbox as our provider we’ll also modify some VM settings in this file.
[cuckoo1]
label = windowsxp
ip = 192.168.56.10
snapshot = snapshot1
This part is optional: sudo nano reporting.conf
    [mongodb]
    enabled = yes
Now start it all up again
cuckoo -d
2019-04-04 12:32:53,616 [cuckoo] WARNING: It appears that you haven't loaded any Cuckoo Signatures. Signatures are highly recommended and improve & enrich the information extracted during an analysis. They also make up for the analysis score that you see in the Web Interface - so, pretty important!
2019-04-04 12:32:53,616 [cuckoo] WARNING: You'll be able to fetch all the latest Cuckoo Signatures, Yara rules, and more goodies by running the following command:
2019-04-04 12:32:53,616 [cuckoo] INFO: $ cuckoo community
Run cuckoo community. I know I could have just told you to do that before but I wanted you to be aware that cuckoo has the ability to download and refresh signatures and rules.
Verify that the cuckoo directory is owned by the cuckoo user.
If not run sudo chown -R cuckoo:cuckoo ~/.cuckoo
Remember that your VM was created by the cuckoo user so don’t expect to find it if you run sudo cuckoo -d
Now run cuckoo -d again.
2019-04-04 17:05:57,609 [cuckoo.core.resultserver] DEBUG: ResultServer running on 192.168.56.1:2042.
2019-04-04 17:05:57,611 [cuckoo.core.scheduler] INFO: Using "virtualbox" as machine manager
2019-04-04 17:05:58,288 [cuckoo.machinery.virtualbox] DEBUG: Restoring virtual machine windowsxp to snapshot1
2019-04-04 17:05:58,727 [cuckoo.core.scheduler] INFO: Loaded 1 machine/s
2019-04-04 17:05:58,767 [cuckoo.core.scheduler] INFO: Waiting for analysis tasks.
Cuckoo is online and awaiting a file submission. Let’s submit a sample from the command line, you can submit any file on the system.
cuckoo submit evilfile.exe
2019-04-04 17:09:25,364 [cuckoo.core.scheduler] DEBUG: Processing task #6
2019-04-04 17:09:25,385 [cuckoo.core.scheduler] INFO: Starting analysis of FILE "evilfile.exe" (task #6, options "")
2019-04-04 17:09:25,509 [cuckoo.core.scheduler] INFO: Task #6: acquired machine cuckoo1 (label=windowsxp)
2019-04-04 17:09:25,510 [cuckoo.core.plugins] DEBUG: Started auxiliary module: Replay
2019-04-04 17:09:25,544 [cuckoo.auxiliary.sniffer] INFO: Started sniffer with PID 3537 (interface=vboxnet0, host=192.168.56.10)
2019-04-04 17:09:25,545 [cuckoo.core.plugins] DEBUG: Started auxiliary module: Sniffer
...
2019-04-04 17:09:25,734 [cuckoo.machinery.virtualbox] DEBUG: Starting vm windowsxp
2019-04-04 17:09:26,048 [cuckoo.machinery.virtualbox] DEBUG: Restoring virtual machine windowsxp to snapshot1
2019-04-04 17:09:26,551 [cuckoo.common.abstracts] DEBUG: Waiting 0 cuckooseconds for machine windowsxp to switch to status ('saved',)
2019-04-04 17:09:27,793 [cuckoo.common.abstracts] DEBUG: Waiting 1 cuckooseconds for machine windowsxp to switch to status ('saved',)
...
2019-04-04 17:30:08,011 [cuckoo.core.scheduler] INFO: Task #6: acquired machine cuckoo1 (label=windowsxp)
2019-04-04 17:30:08,012 [cuckoo.core.plugins] DEBUG: Started auxiliary module: Replay
2019-04-04 17:30:08,025 [cuckoo.auxiliary.sniffer] INFO: Started sniffer with PID 7198 (interface=vboxnet0, host=192.168.56.10)
2019-04-04 17:30:08,027 [cuckoo.core.plugins] DEBUG: Started auxiliary module: Sniffer
2019-04-04 17:30:08,211 [cuckoo.machinery.virtualbox] DEBUG: Starting vm windowsxp
2019-04-04 17:30:08,508 [cuckoo.machinery.virtualbox] DEBUG: Restoring virtual machine windowsxp to snapshot1
2019-04-04 17:30:11,536 [cuckoo.core.guest] INFO: Starting analysis on guest (id=cuckoo1, ip=192.168.56.10)
2019-04-04 17:30:12,548 [cuckoo.core.guest] DEBUG: cuckoo1: not ready yet
2019-04-04 17:30:13,553 [cuckoo.core.guest] DEBUG: cuckoo1: not ready yet
2019-04-04 17:30:16,586 [cuckoo.core.guest] DEBUG: cuckoo1: waiting for status 0x0001
2019-04-04 17:30:16,595 [cuckoo.core.guest] DEBUG: cuckoo1: status ready
2019-04-04 17:30:16,699 [cuckoo.core.guest] DEBUG: Uploading analyzer to guest (id=cuckoo1, ip=192.168.56.10, monitor=latest, size=3884139)
2019-04-04 17:30:18,723 [cuckoo.core.guest] DEBUG: cuckoo1: analyzer started with PID 1616
2019-04-04 17:30:18,811 [cuckoo.core.guest] DEBUG: cuckoo1: waiting for completion
2019-04-04 17:30:19,280 [cuckoo.core.resultserver] DEBUG: LogHandler for live analysis.log initialized.
2019-04-04 17:30:19,823 [cuckoo.core.guest] DEBUG: cuckoo1: analysis not completed yet (status=2)
2019-04-04 17:30:20,834 [cuckoo.core.guest] DEBUG: cuckoo1: analysis not completed yet (status=2)
2019-04-04 17:30:23,484 [cuckoo.core.resultserver] DEBUG: New process (pid=1880, ppid=1960, name=PIL-1.1.7.win32-py2.7.exe)
2019-04-04 17:30:23,884 [cuckoo.core.guest] DEBUG: cuckoo1: analysis not completed yet (status=2)
2019-04-04 17:30:24,481 [cuckoo.core.resultserver] DEBUG: File upload request for shots/0001.jpg
2019-04-04 17:30:24,493 [cuckoo.core.resultserver] DEBUG: Uploaded file length: 45281
2019-04-04 17:30:24,894 [cuckoo.core.guest] DEBUG: cuckoo1: analysis not completed yet (status=2)
2019-04-04 17:30:25,599 [cuckoo.core.resultserver] DEBUG: File upload request for shots/0002.jpg
2019-04-04 17:30:25,619 [cuckoo.core.resultserver] DEBUG: Uploaded file length: 62214
2019-04-04 17:30:25,903 [cuckoo.core.guest] DEBUG: cuckoo1: analysis not completed yet (status=2)
2019-04-04 17:30:26,710 [cuckoo.core.resultserver] DEBUG: File upload request for shots/0003.jpg
2019-04-04 17:30:26,727 [cuckoo.core.resultserver] DEBUG: Uploaded file length: 62648
2019-04-04 17:30:26,912 [cuckoo.core.guest] DEBUG: cuckoo1: analysis not completed yet (status=2)
2019-04-04 17:33:19,549 [cuckoo.core.guest] INFO: cuckoo1: end of analysis reached!
2019-04-04 17:33:19,642 [cuckoo.core.plugins] DEBUG: Stopped auxiliary module: Replay
2019-04-04 17:33:19,683 [cuckoo.core.plugins] DEBUG: Stopped auxiliary module: Sniffer
2019-04-04 17:33:19,684 [cuckoo.machinery.virtualbox] DEBUG: Stopping vm windowsxp
2019-04-04 17:33:21,358 [cuckoo.core.scheduler] DEBUG: Released database task #6
2019-04-04 17:33:21,502 [cuckoo.core.plugins] DEBUG: Executed processing module "AnalysisInfo" for task #6
2019-04-04 17:33:21,630 [cuckoo.core.plugins] DEBUG: Executed processing module "BehaviorAnalysis" for task #6
2019-04-04 17:33:21,643 [cuckoo.core.plugins] DEBUG: Executed processing module "Dropped" for task #6
2019-04-04 17:33:21,644 [cuckoo.core.plugins] DEBUG: Executed processing module "DroppedBuffer" for task #6
2019-04-04 17:33:21,645 [cuckoo.core.plugins] DEBUG: Executed processing module "MetaInfo" for task #6
2019-04-04 17:33:21,646 [cuckoo.core.plugins] DEBUG: Executed processing module "ProcessMemory" for task #6
2019-04-04 17:33:21,647 [cuckoo.core.plugins] DEBUG: Executed processing module "Procmon" for task #6
2019-04-04 17:33:21,823 [cuckoo.core.plugins] DEBUG: Executed processing module "Screenshots" for task #6
2019-04-04 17:33:22,714 [cuckoo.core.plugins] DEBUG: Executed processing module "Static" for task #6
2019-04-04 17:33:22,825 [cuckoo.core.plugins] DEBUG: Executed processing module "Strings" for task #6
2019-04-04 17:33:22,899 [cuckoo.core.plugins] DEBUG: Executed processing module "TargetInfo" for task #6
2019-04-04 17:33:22,911 [cuckoo.core.plugins] DEBUG: Executed processing module "NetworkAnalysis" for task #6
2019-04-04 17:33:22,911 [cuckoo.core.plugins] DEBUG: Executed processing module "Extracted" for task #6
2019-04-04 17:33:22,912 [cuckoo.core.plugins] DEBUG: Executed processing module "TLSMasterSecrets" for task #6
2019-04-04 17:33:22,917 [cuckoo.core.plugins] DEBUG: Executed processing module "Debug" for task #6
2019-04-04 17:33:22,921 [cuckoo.core.plugins] DEBUG: Running 540 signatures
2019-04-04 17:33:23,852 [cuckoo.core.plugins] DEBUG: Analysis matched signature: has_pdb
2019-04-04 17:33:23,853 [cuckoo.core.plugins] DEBUG: Analysis matched signature: packer_entropy
2019-04-04 17:33:23,985 [cuckoo.core.plugins] DEBUG: Executed reporting module "JsonDump"
2019-04-04 17:33:24,299 [cuckoo.core.plugins] DEBUG: Executed reporting module "MongoDB"
2019-04-04 17:33:24,299 [cuckoo.core.scheduler] INFO: Task #6: reports generation completed
2019-04-04 17:33:24,319 [cuckoo.core.scheduler] INFO: Task #6: analysis procedure completed
Launching Cuckoo the next time
[cuckoo] CRITICAL: CuckooCriticalError: Unable to bind ResultServer on 192.168.56.1:2042 [Errno 99] Cannot assign re
quested address. This usually happens when you start Cuckoo without bringing up the virtual interface associated with the ResultServer IP ad
dress. Please refer to https://cuckoo.sh/docs/faq/#troubles-problem for more information.
Run:
VBoxManage hostonlyif create
VBoxManage hostonlyif ipconfig vboxnet0 --ip 192.168.56.1 --netmask 255.255.255.0
before running cuckoo -d
Cuckoo API
Start the API listener
cuckoo api --host 0.0.0.0
Runs on port 8090 by default.
I’m calling Cuckoo Sandbox from Cortex and I’m currently unsure how to pass an API token from there so for now I’m just disabling authentication.
nano /home/cuckoo/.cuckoo/conf/cuckoo.conf
Comment out the api_token
Launch cuckoo web server
Submit files and view results on the cuckoo webpage.
cuckoo web -H 0.0.0.0
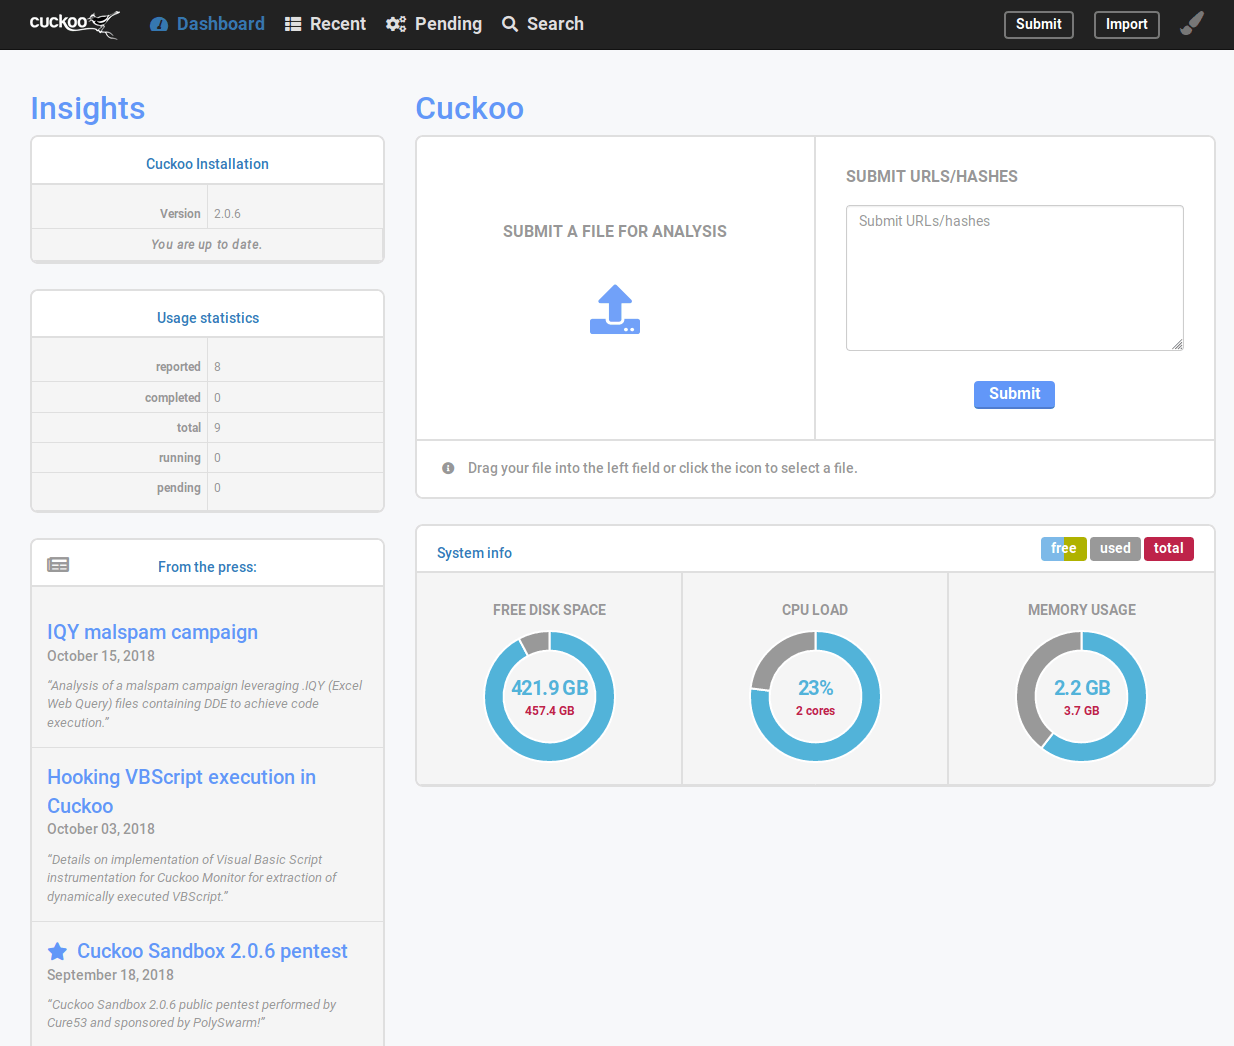
Navigate to http://<IP of server>:8000 to view the Dashboard.
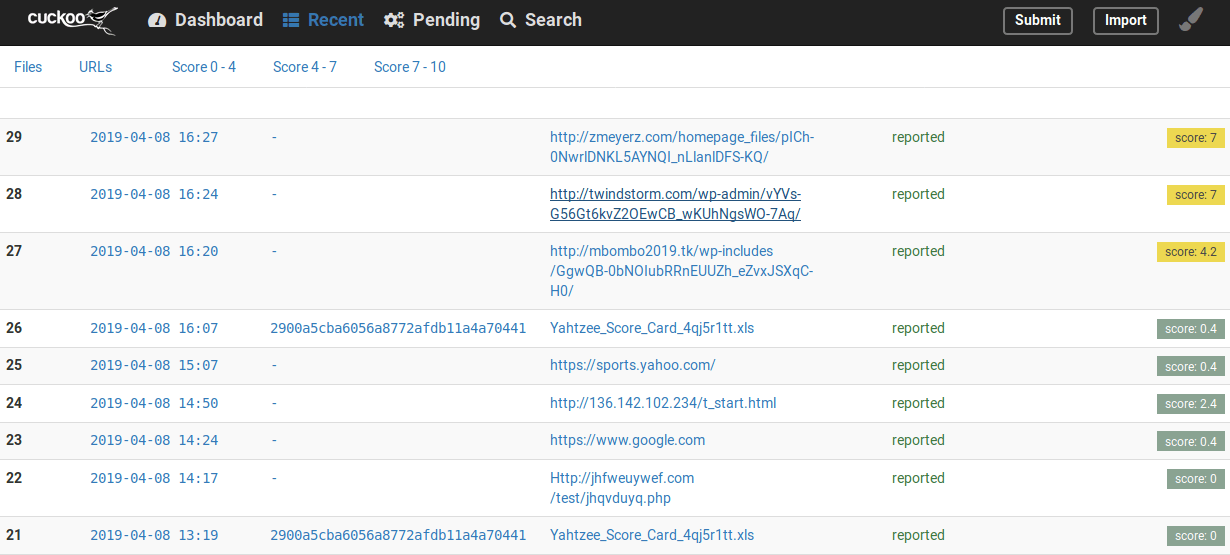
View the results of recently run scans and open the summary page.
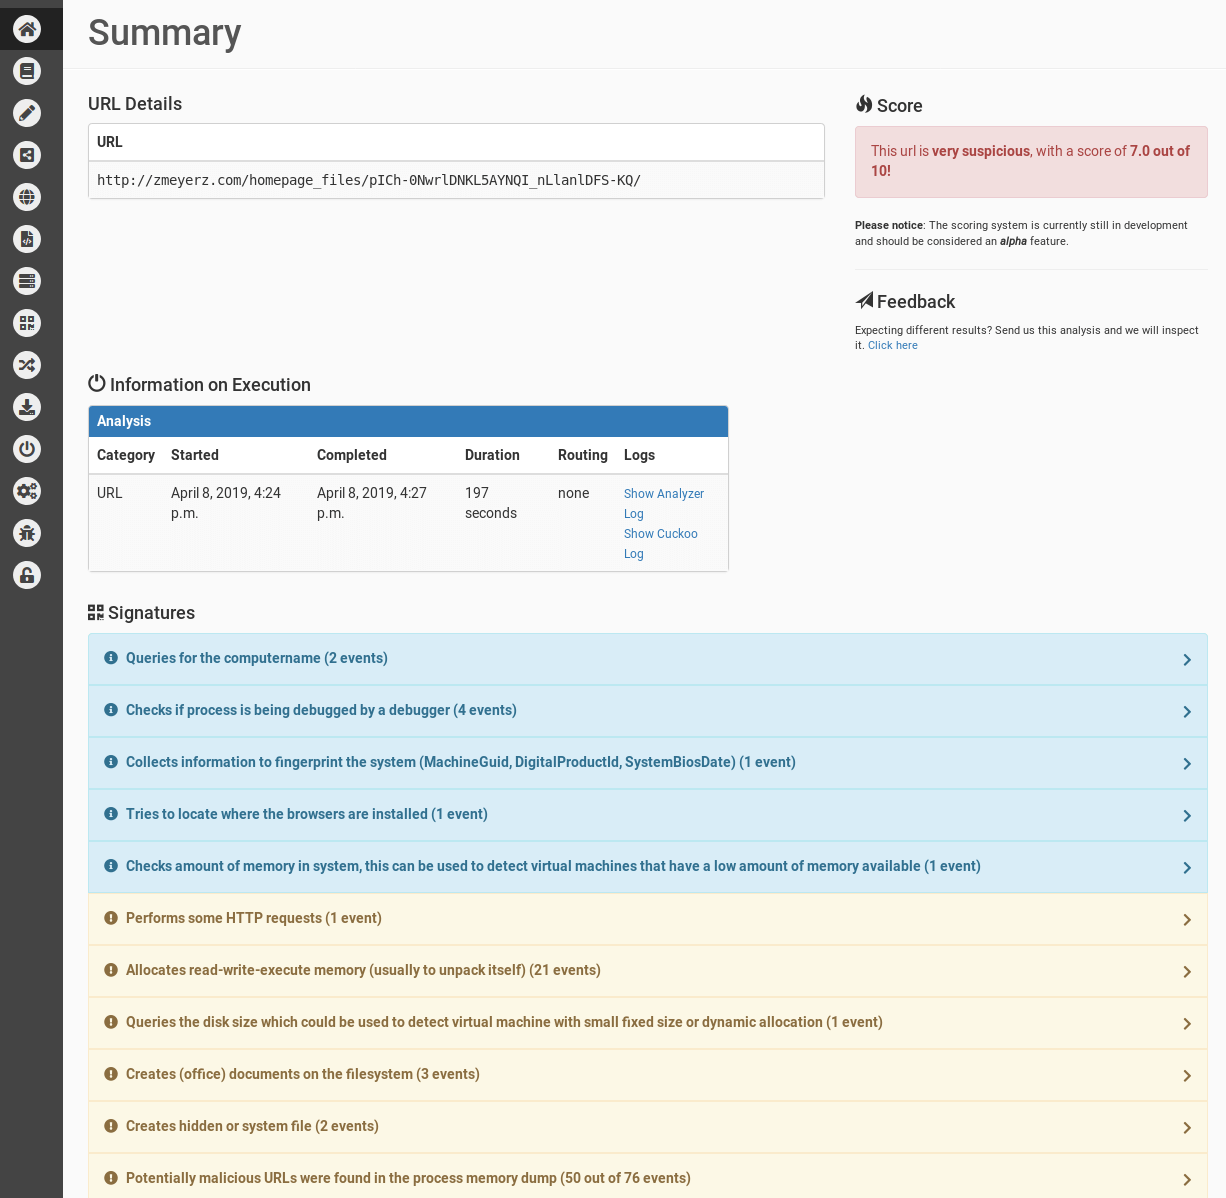
View an analysis summary.
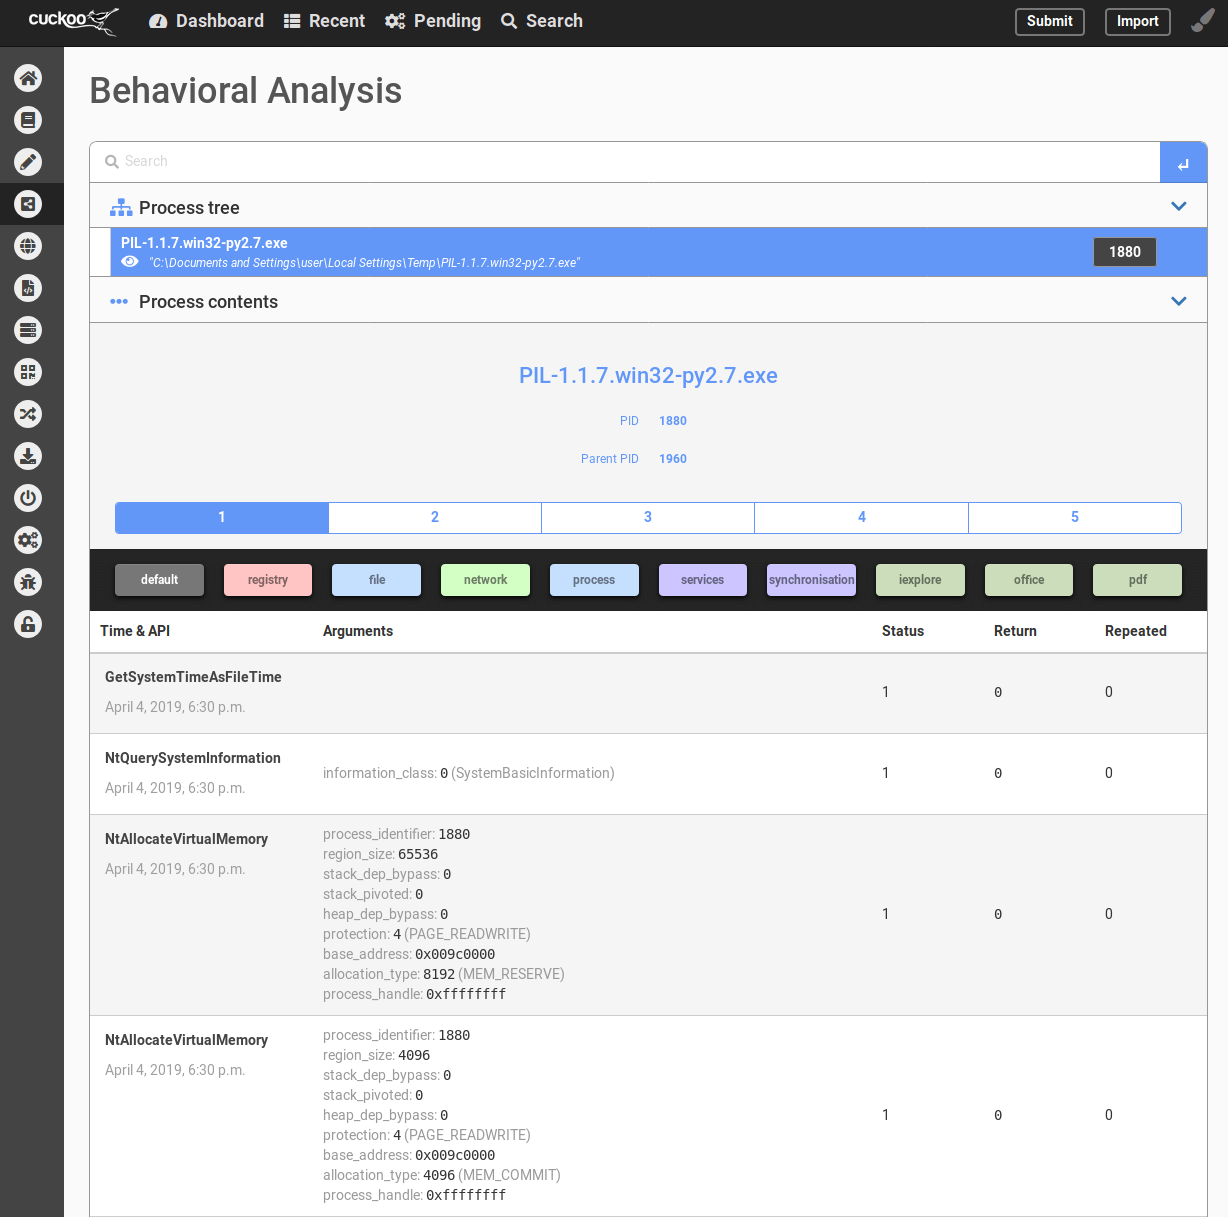
View in-depth system activity.
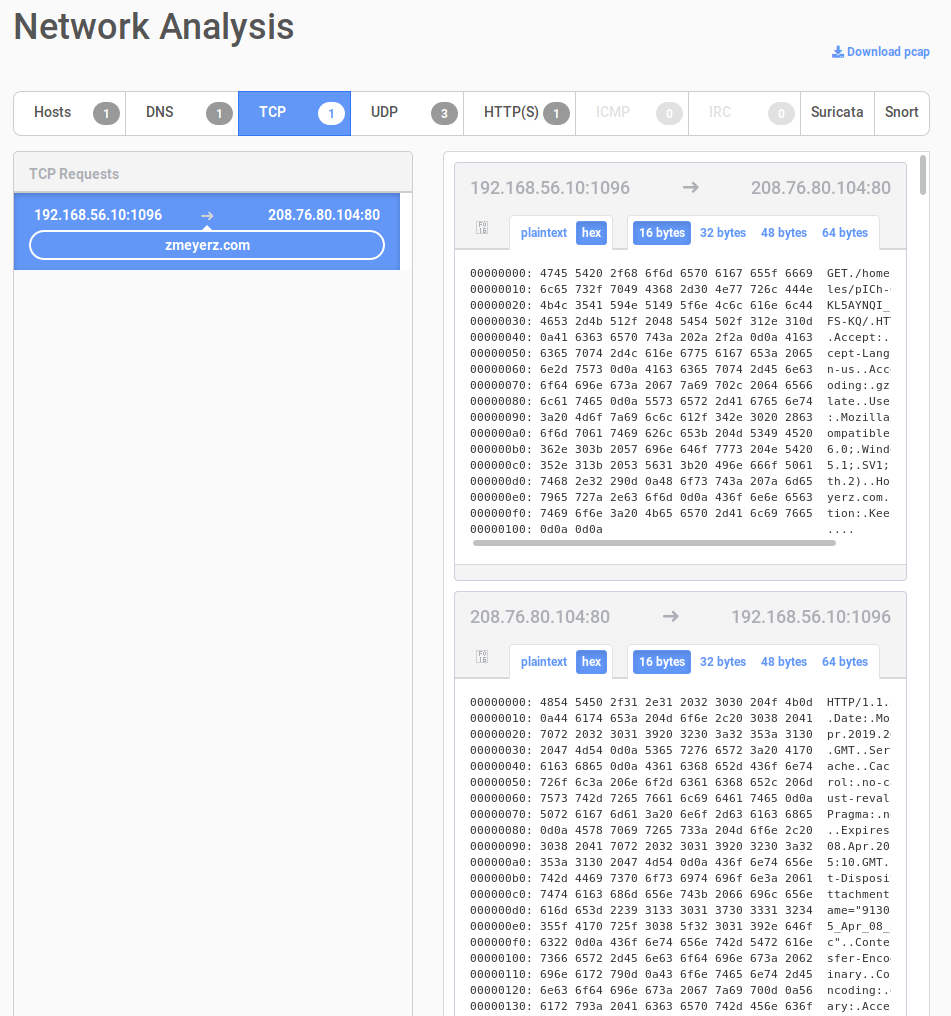
View and capture network activity.
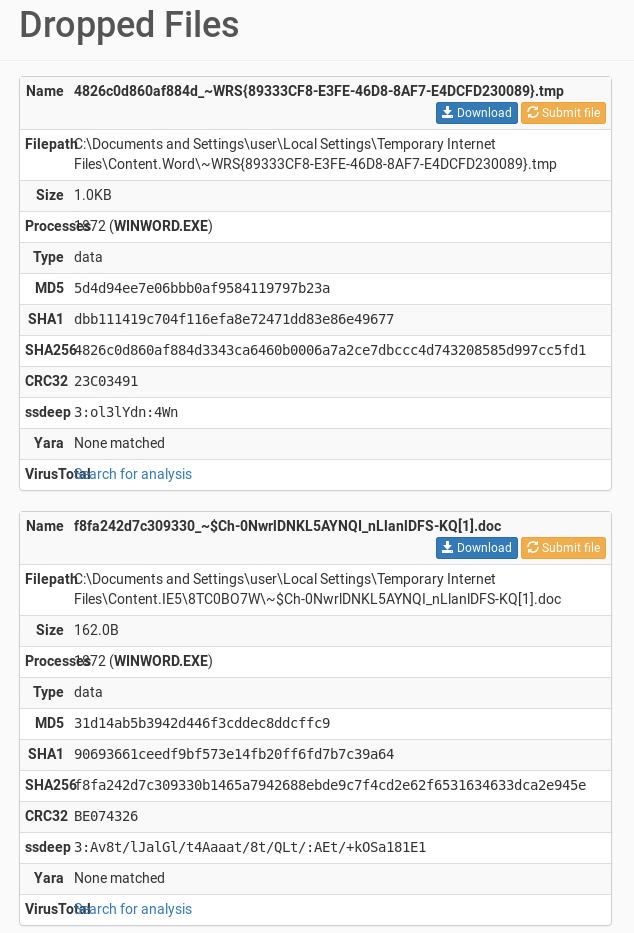
See additional files that are downloaded
You now have your very own sandbox in which to detonate any suspicious file you come across. Consider enabling the Cuckoo Analyzer in Cortex and giving it the IP of your new sandbox server.